How to Create A Character Turnaround Sheet & Animate it
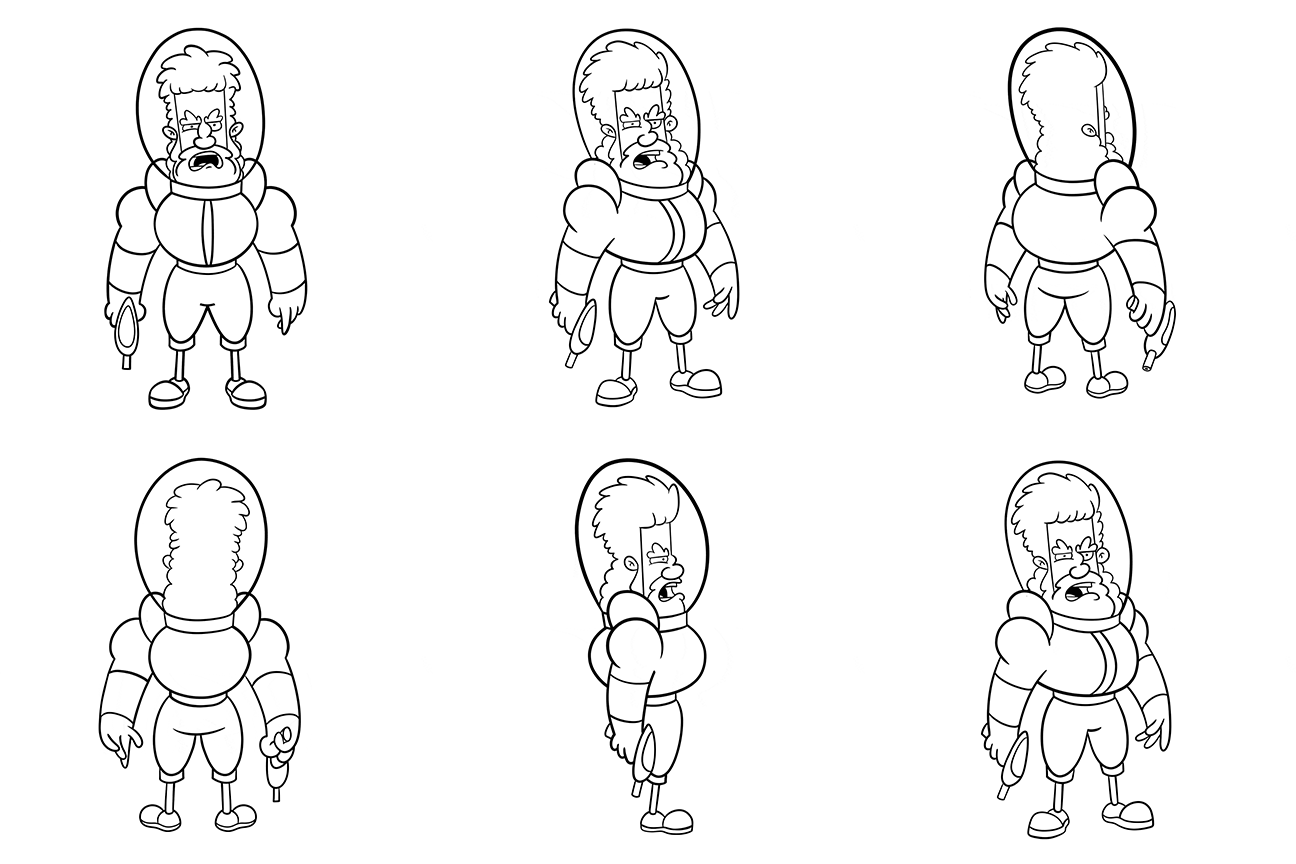
This is my easy to follow guide on how to create a character turnaround sheet for digital artists!
There’s no correct way of doing it, everybody has their own methods so I want to share mine with any artist who want to achieve a turnaround for their own characters to use with any project they need!
This is a character I’ve gotten comfortable drawing over the years so I felt he would be perfect for this tutorial since he’s got relatively simple round shapes
Materials Needed:
Pen/Pencil
Paper
Scanner or Camera
Photoshop, FireAlpaca, Corel, Illustrator, Clip Studio
or any drawing platform of your choice that works in layers.
Drawing tablet!
Let’s get started!
Once you've chosen a character you want to use, draw them in a front, three-quarter, side and back view.
It’s a good idea to pick a character you’re comfortable drawing that is symmetrical on both sides, meaning if you flip them horizontally they still look identical. My character is identical on both sides minus in one hand he’s holding on to a gun, meaning I would have to draw that gun holding hand over again on the flipped pose.
With character design, the goal is to convey your character’s personality, but keep in mind you’ll be drawing this character in several views so it’s a good idea to keep the pose “simple enough”.
But also, you do you!
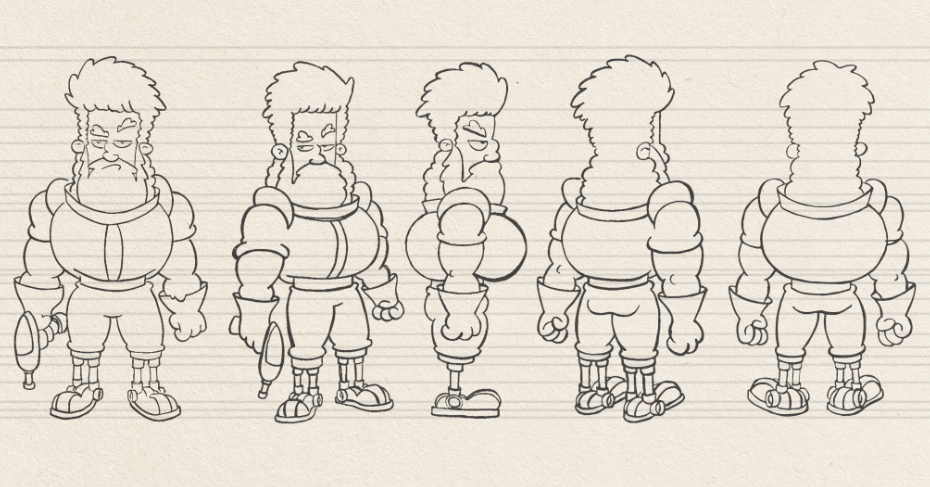
It's always a good idea to draw a rough sketch of each pose first either on paper or digitally
Once you draw the first pose, you’re going to (if working on paper) use a ruler to draw some straight lines so that when you start drawing the next pose you can line everything up. This is very important!!
Try your best but keep in mind this just a rough sketch so we’ll focus on getting it perfect once we’re cleaning up the lines digitally.
Now that you’ve sketched your character in each pose, scan your art and pull it up on Photoshop or any drawing platform you use, FireAlpaca, Corel, Illustrator, Clip Studio etc.
Place your scanned image in a layer and lower the opacity so that you can get to work. Now create an empty layer on top of that and start illustrating one pose, ideally one where the character is facing forward so that you can illustrate their facial features.
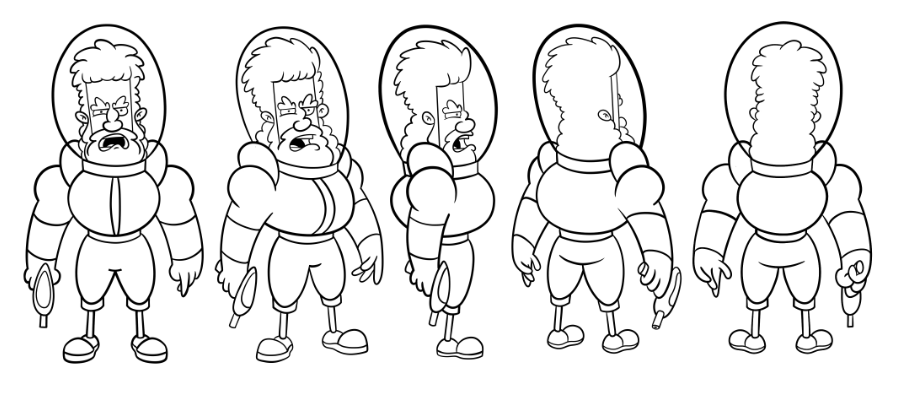
While working on the clean up I made some design changes like simplifying his arms, legs, and changing up his hair.
Once you’re done cleaning up the first pose, you’ve got yourself a much better guide to illustrate the rest.
And when I can’t get some parts just right, for example, his shoulder, I’ll drag the first pose under the one I’m working on and trace the shoulder, that often does the trick and helps me visualize other shapes as well!
Tracing over the first pose can be very helpful when feeling stuck!
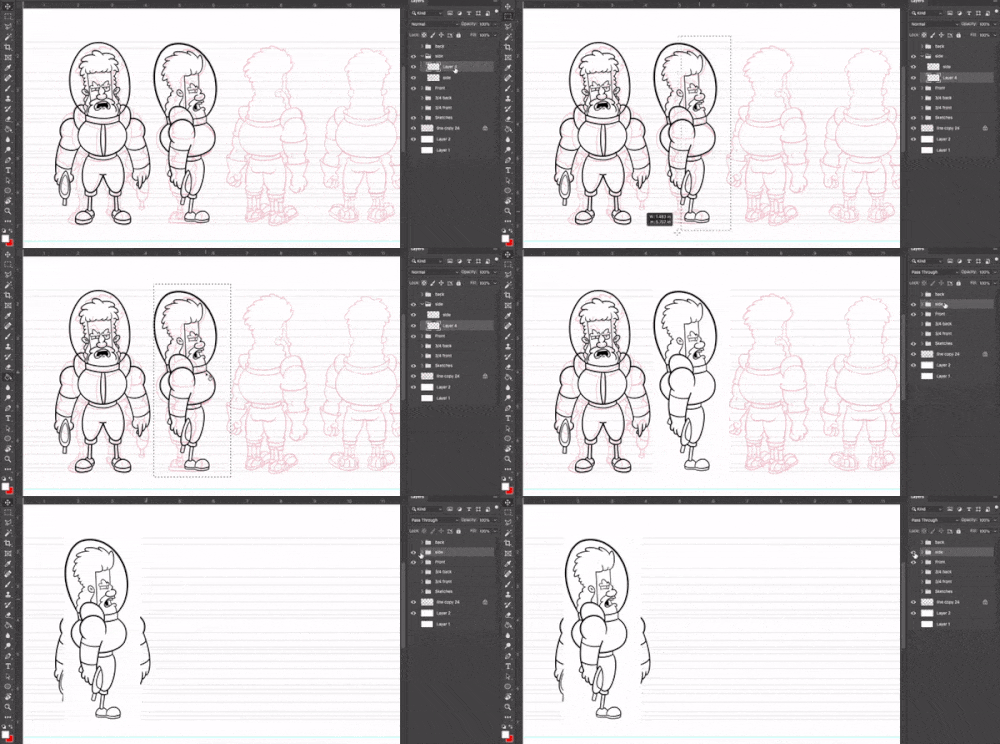
When you’re done with the second pose, a good way to double check if it seems right is to create a white layer under the second pose layer, group them, drag it on top of the first layer and turn the visibility on and off!
Illustrating the three/quarter can be tricky, that’s why I drew mine after I finished front and side view. But drawing the three/quarter view from behind can be even trickier!
So for this I find it helpful to duplicate the front three/quarter view and flip it horizontally. That way I can trace over some areas such as the legs, arms and shoulders that are supposed to look identical anyway!
Tracing isn’t cheating if it’s your own artwork!!
You can do the same for the back view as well, simply duplicate the front view, flip it horizontally and trace away. You can even duplicate the identical artworks, like the left leg, flip it horizontally place it where the right leg should be. Easy peasy!
Make sure to duplicate the identical areas so you can flip them horizontally and place them opposite. This not only saves time, but also makes the artwork symmetrical.
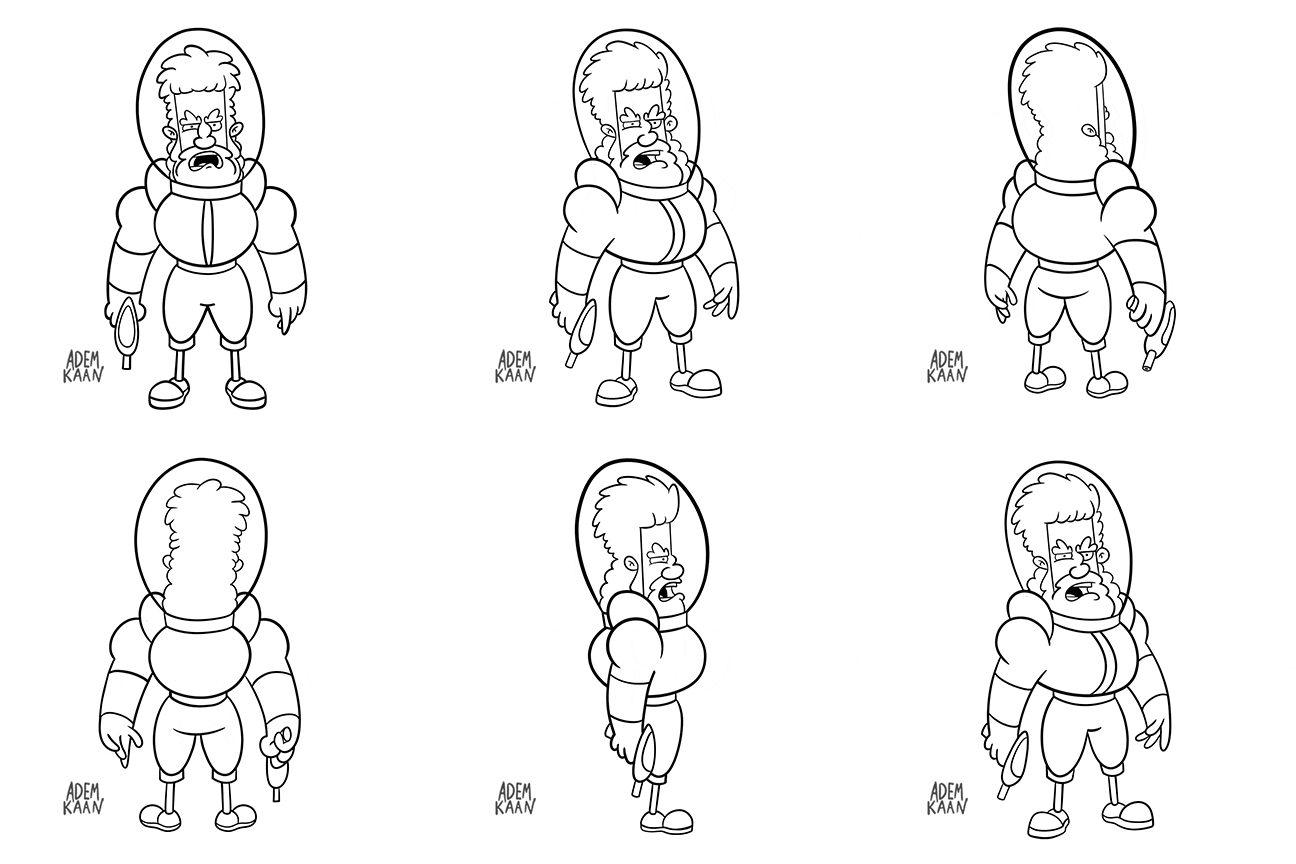
With the back view complete, you’re finally done!
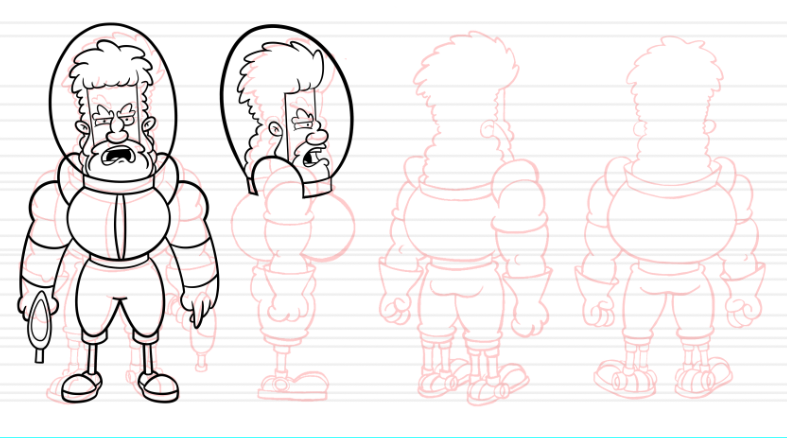
The final cleaned up lines with the rough sketches under to see the transformation the character has gone through
However if your character is not identical on both sides, let’ say you’re drawing the Batman villain Two-Face, then it’s time to get sketching because you’re going to have to illustrate their other side profile view, flipped three-quarter view from the front and back.
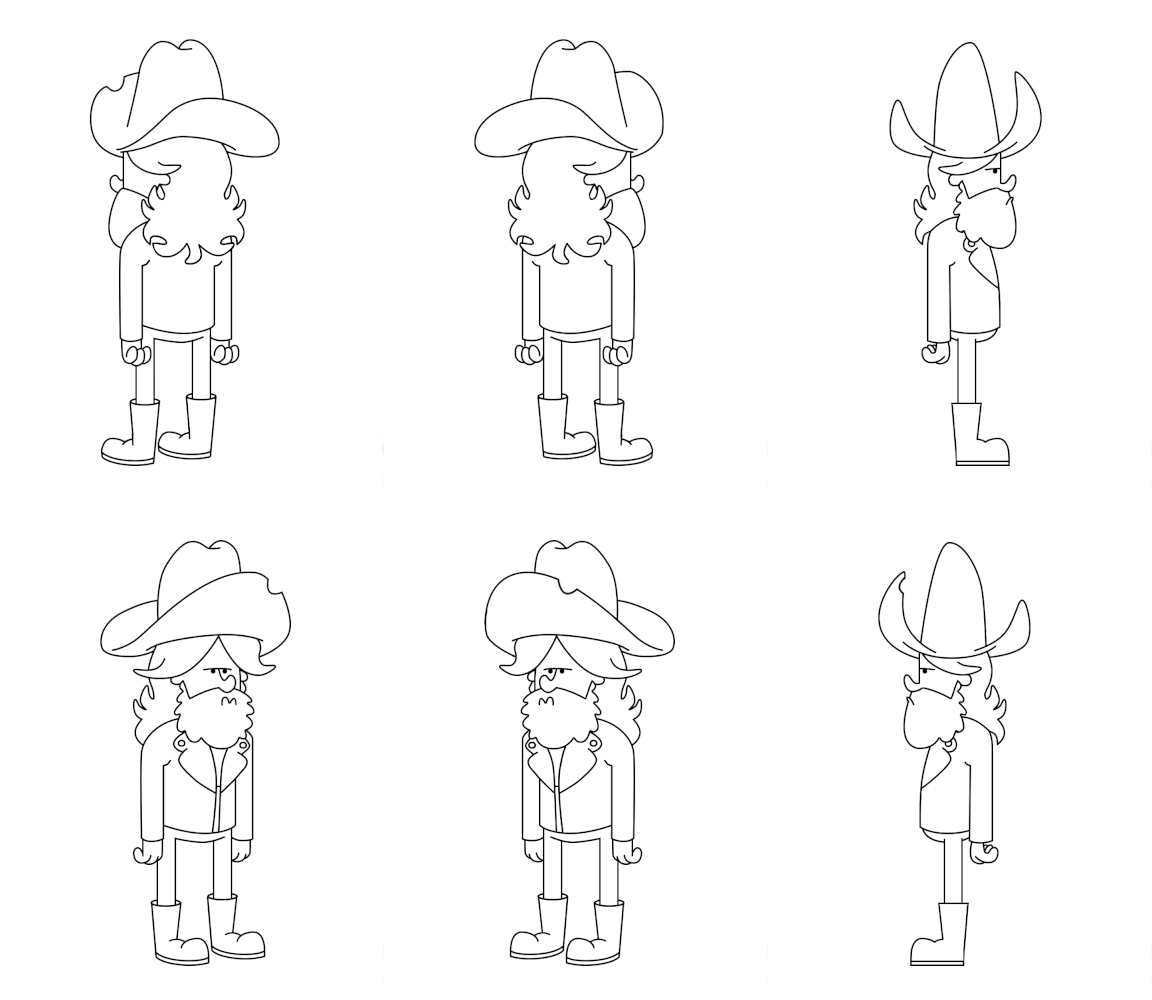
This is because when your character rotates their left side does not look like their right side, so you cannot get away with just flipping one side horizontally! Like the way I was able to with this character below.
Minus the tiny detail on this character’s hat, he is completely identical from his left and right, so the side and three-quarter views have been flipped.
Bonus step: Animating your character turnaround
Here’s a half character rotation
And here’s a full character rotation
Regardless if we have 8 poses or 5, we can still animate a rotation and see how our character looks from all angles! For this step we’re going to need to use Photoshop, other programs can be used to achieve this but I find Photoshop to be the most convenient.
Firstly, let’s create a square canvas with a white background, the size shouldn’t be any smaller than 5 x 5 inches and 300dpi.
Next, let’s open up our file (in Photoshop) where we drew our character turnaround and make sure that all poses are on separate layers.
*** Just to be safe it’s a good idea to click on Save As and save a duplicate of this file so that when we save it, we’re not overriding our original Turnaround file***
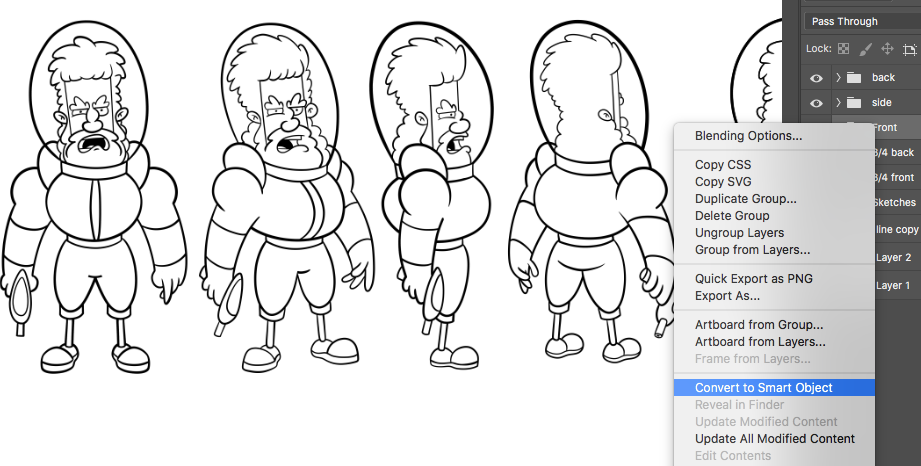
Now let’s right click on any layer with the separate character pose like the three-quarter view, and click on the Convert to Smart Object option. Do this for every individual pose layer (do not select on every layer at once and convert them to a smart object as this will merge them all into one layer).
The reason we’re doing this is because we’ll possibly be distorting and transforming these layers, so by converting it into a Smart Object we’re preserving all the image date and not losing any of it’s original quality.
After converting each pose into a Smart Object, lets select all these layers at once, you can do this by clicking your first pose layer, holding down the Shift key and clicking on your last pose layer.
With al the layers selected, lets click and hold down anywhere on our canvas, and drag it onto the square file we created in the beginning.
With your characters now in the new file, place them all on top of each other and make sure your layers are chronological, meaning they should be “Front, Three-quarter view (Front), Side, Three-quarter view (Back) and Back”.
Now from the Window tab click on Timeline. And then click on Create Video Timeline. From here you can click on the the right side of your layers on top the Timeline and decrease or increase their frame size.
After doing this make sure hit play and see how it looks, experiment with the frame lengths and see what feels best!
When you’re happy with it, from the File tab click on Save for Web, and on the bottom right where it says Looping Options, select Forever so that your gif can be on a constant loop.
And now you’re done, you’ve got yourself a complete character turnaround sheet as well as an animated gif of it.
Let me know if you found this guide to be helpful and if there are any areas that need better clarification. Hope you enjoyed, illustrate away!
